
Wallet setup before your first swap
You can usually create a self-custody crypto wallet without opening an exchange account or submitting identity documents. What you do need is the right wallet, a recoverable backup and a receiving address for the exact cryptocurrency and network you intend to use. A wallet without KYC does not automatically make its transactions anonymous. This guide walks through the decisions that matter before you create your first swap order.
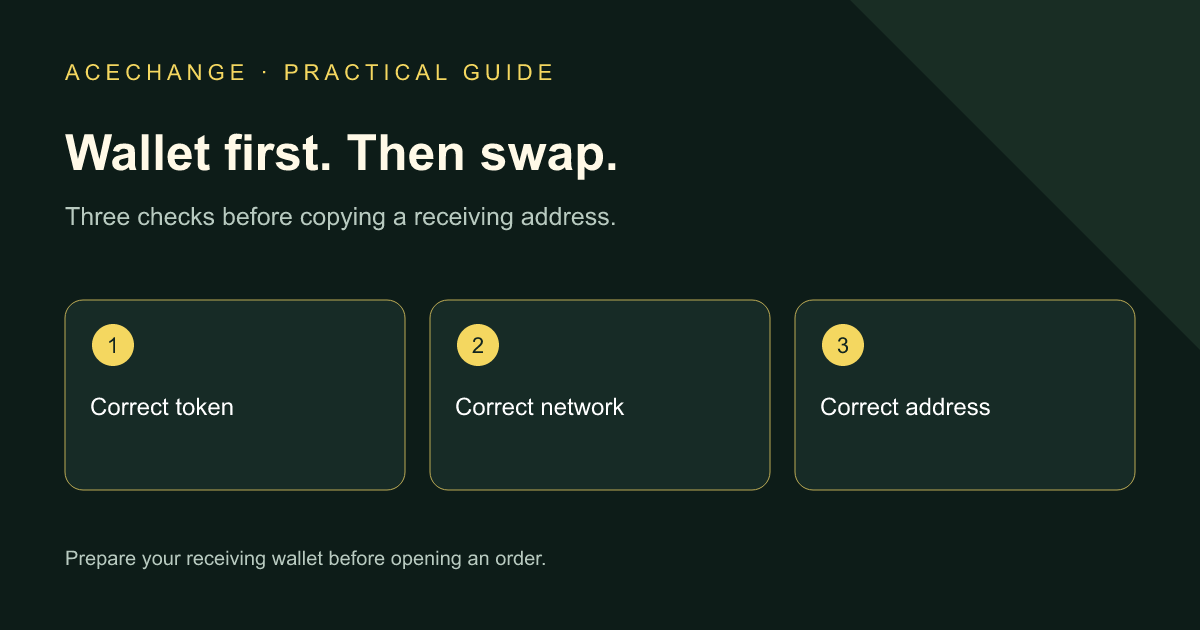
1. Choose a wallet for what you want to receive
Start with one question: what should arrive when the swap finishes? “Crypto” is not a precise enough answer. Bitcoin, Monero and USDT on a particular network have different requirements. Your receiving wallet must support the exact output selected in the swap form. A familiar token icon or a similar-looking address does not establish compatibility.
For Monero, prepare a Monero wallet. For USDT on TRON, confirm that your wallet supports USDT on TRON. It is not enough to find USDT somewhere in the application’s asset list. Check the network alongside the token. The issuer’s supported protocols explain the different versions of USDT; the wallet’s own documentation tells you which of those versions it can receive and manage.
Next, establish who controls the keys. With a self-custody wallet, you are responsible for the information needed to access and recover it. An exchange account is a service with its own deposit, withdrawal and account-recovery rules. Both applications might display a Receive button, but that does not mean you have the same control over the funds. Ethereum’s wallet explanation describes the distinction between wallets, accounts and keys.
| Your goal | The destination must support | Check before swapping |
|---|---|---|
| Receive BTC in your own wallet | The Bitcoin delivery method and address type used by the order | Whether the payout is on-chain BTC or another supported method |
| Receive XMR | Monero and the intended receiving account | Address or subaddress, backup and synchronization |
| Receive USDT | USDT on the exact selected network | Token, network and the cost of sending it onward |
| Receive directly into an exchange account | An active deposit facility for that asset and network | Deposit minimum, memo or tag, and current exchange requirements |
Keep your first route straightforward. Changing the wallet, network and backup method at the same time makes a problem harder to diagnose. A simple route gives you three clear reference points: the asset you sent, the destination you selected and the application that should show the result.
Self-custody describes control of your wallet’s keys; it does not describe every service you might use with that wallet. In a deposit-funded swap, you send the input asset to an order address and wait for the provider to process it. You do not hand over your original private keys, but the transferred deposit is no longer part of your original wallet’s balance. Keep wallet security separate from the exchange provider’s processing terms. See Cake Wallet’s self-custody description and FixedFloat’s deposit instructions and terms.
2. No KYC and transaction privacy answer different questions
If an application does not request identification when you create a wallet, that tells you about wallet creation. It does not establish whether its blockchain is public, whether a card purchase requires verification or what an external swap provider requires. One wallet application can offer several services operated by different companies. Check which company handles the particular action you are about to take.
A wallet without registration and an exchange without verification are not interchangeable promises. An external provider may request additional information or verification under its own rules. FixedFloat describes such circumstances in section 7 of its terms. Read the applicable provider’s conditions before funding an order, rather than assuming the wallet’s setup process determines the exchange rules.
Separate three questions: do I need an account to create this wallet; what can someone observe on this blockchain; and what information does the exchange provider receive? The answers can differ within a single transaction flow. The absence of a registration screen does not prove that no transaction information or technical records exist.
Bitcoin, for example, has a public transaction history. A new receiving address reduces address reuse, but it does not remove every way transactions can be linked. Treat “privacy wallet” as a description to investigate, rather than a universal anonymity guarantee. Bitcoin.org’s privacy guidance explains why your handling of addresses and transaction information matters.
A practical privacy goal is to disclose less unnecessary information, avoid publishing balances, protect your keys and understand who processes an order. For broader device preparation, read our device setup guide. Before resetting or replacing a phone, however, make sure you can recover every wallet you still need.
3. Verify the download before creating a wallet
Start at the wallet’s official website and follow its link to the appropriate app store or distribution channel. Avoid installers sent through private messages. Names, icons and search advertisements can imitate a legitimate product; visual familiarity is not a check of the publisher.
For Cake Wallet, begin at cakewallet.com and select the download for your device. If you already have the application, check for updates through its usual trusted channel. A stranger claiming to be support should not need you to install a different wallet to make a pending swap arrive faster.
Set aside enough time to complete the backup without interruptions. Turn off screen sharing before displaying recovery words. Do not show them during a call or include them in a tutorial screenshot. Nobody following this guide needs to see your seed phrase, and a screenshot of a real funded wallet’s recovery material should never be used as an illustration.
Keep the operating system and wallet updated. If a device unexpectedly changes copied addresses, redirects you to unfamiliar sites or shows signs of unauthorized changes, pause before paying. Creating another swap does not repair a compromised device. Resolve the device problem before using it to manage funds. Bitcoin.org’s wallet-security guidance covers backups, updates and protecting access.
4. Know the difference between a PIN, recovery phrase and address
These items have different jobs. A PIN unlocks the application on your device. A recovery phrase is used to restore access to the wallet. A receiving address tells a sender where to deliver an asset. Confusing those roles can turn a routine setup into a loss of control over your funds.
| Information | Purpose | Enter it in the order? |
|---|---|---|
| Receiving address | Identifies the delivery destination | Yes, for the correct asset and network |
| Memo or destination tag | Helps a receiving service credit the correct account | Yes, when the destination requires it |
| Wallet PIN | Unlocks the application | No |
| Recovery phrase | Restores access to wallet keys | Never |
| Private key | Authorizes the relevant wallet operations | Never |
Stop if someone asks for recovery words to “synchronize” or “validate” a swap. Support may need to identify an order or inspect public transaction information. It does not need control over your wallet. Do not enter secrets into an address-verification form or a troubleshooting website sent in a private message.
Store the backup somewhere you can find it without exposing it to visitors or automatic photo sharing. Keep a private note of the wallet type and which backup belongs to it. With several wallets, this small amount of organization matters: relying on your memory of which application you installed first becomes much less useful a year later.
5. Prepare a Monero wallet in Cake Wallet
The control names below follow Cake Wallet’s documentation. Their appearance can differ between operating systems and releases. If your screen looks different, find the matching function and consult the official instructions. Use the screenshots to understand the steps, rather than treating a button’s old position as a permanent part of the interface.
Step A: set the application PIN
On the opening screen, choose Set a PIN, enter a PIN and confirm it. Cake Wallet also offers a six-digit PIN option. Choose a code that someone who knows your birthday would not easily guess. Remember that the PIN is not a wallet backup: it cannot restore your wallet on a replacement phone. The official setup instructions explain this first step.
Step B: create the right wallet
Select Create New Wallet, choose Monero and give the wallet a name you will recognize. If you are recovering an existing wallet, choose the restoration process instead. Creating an empty new wallet does not bring across the balance of an old one.
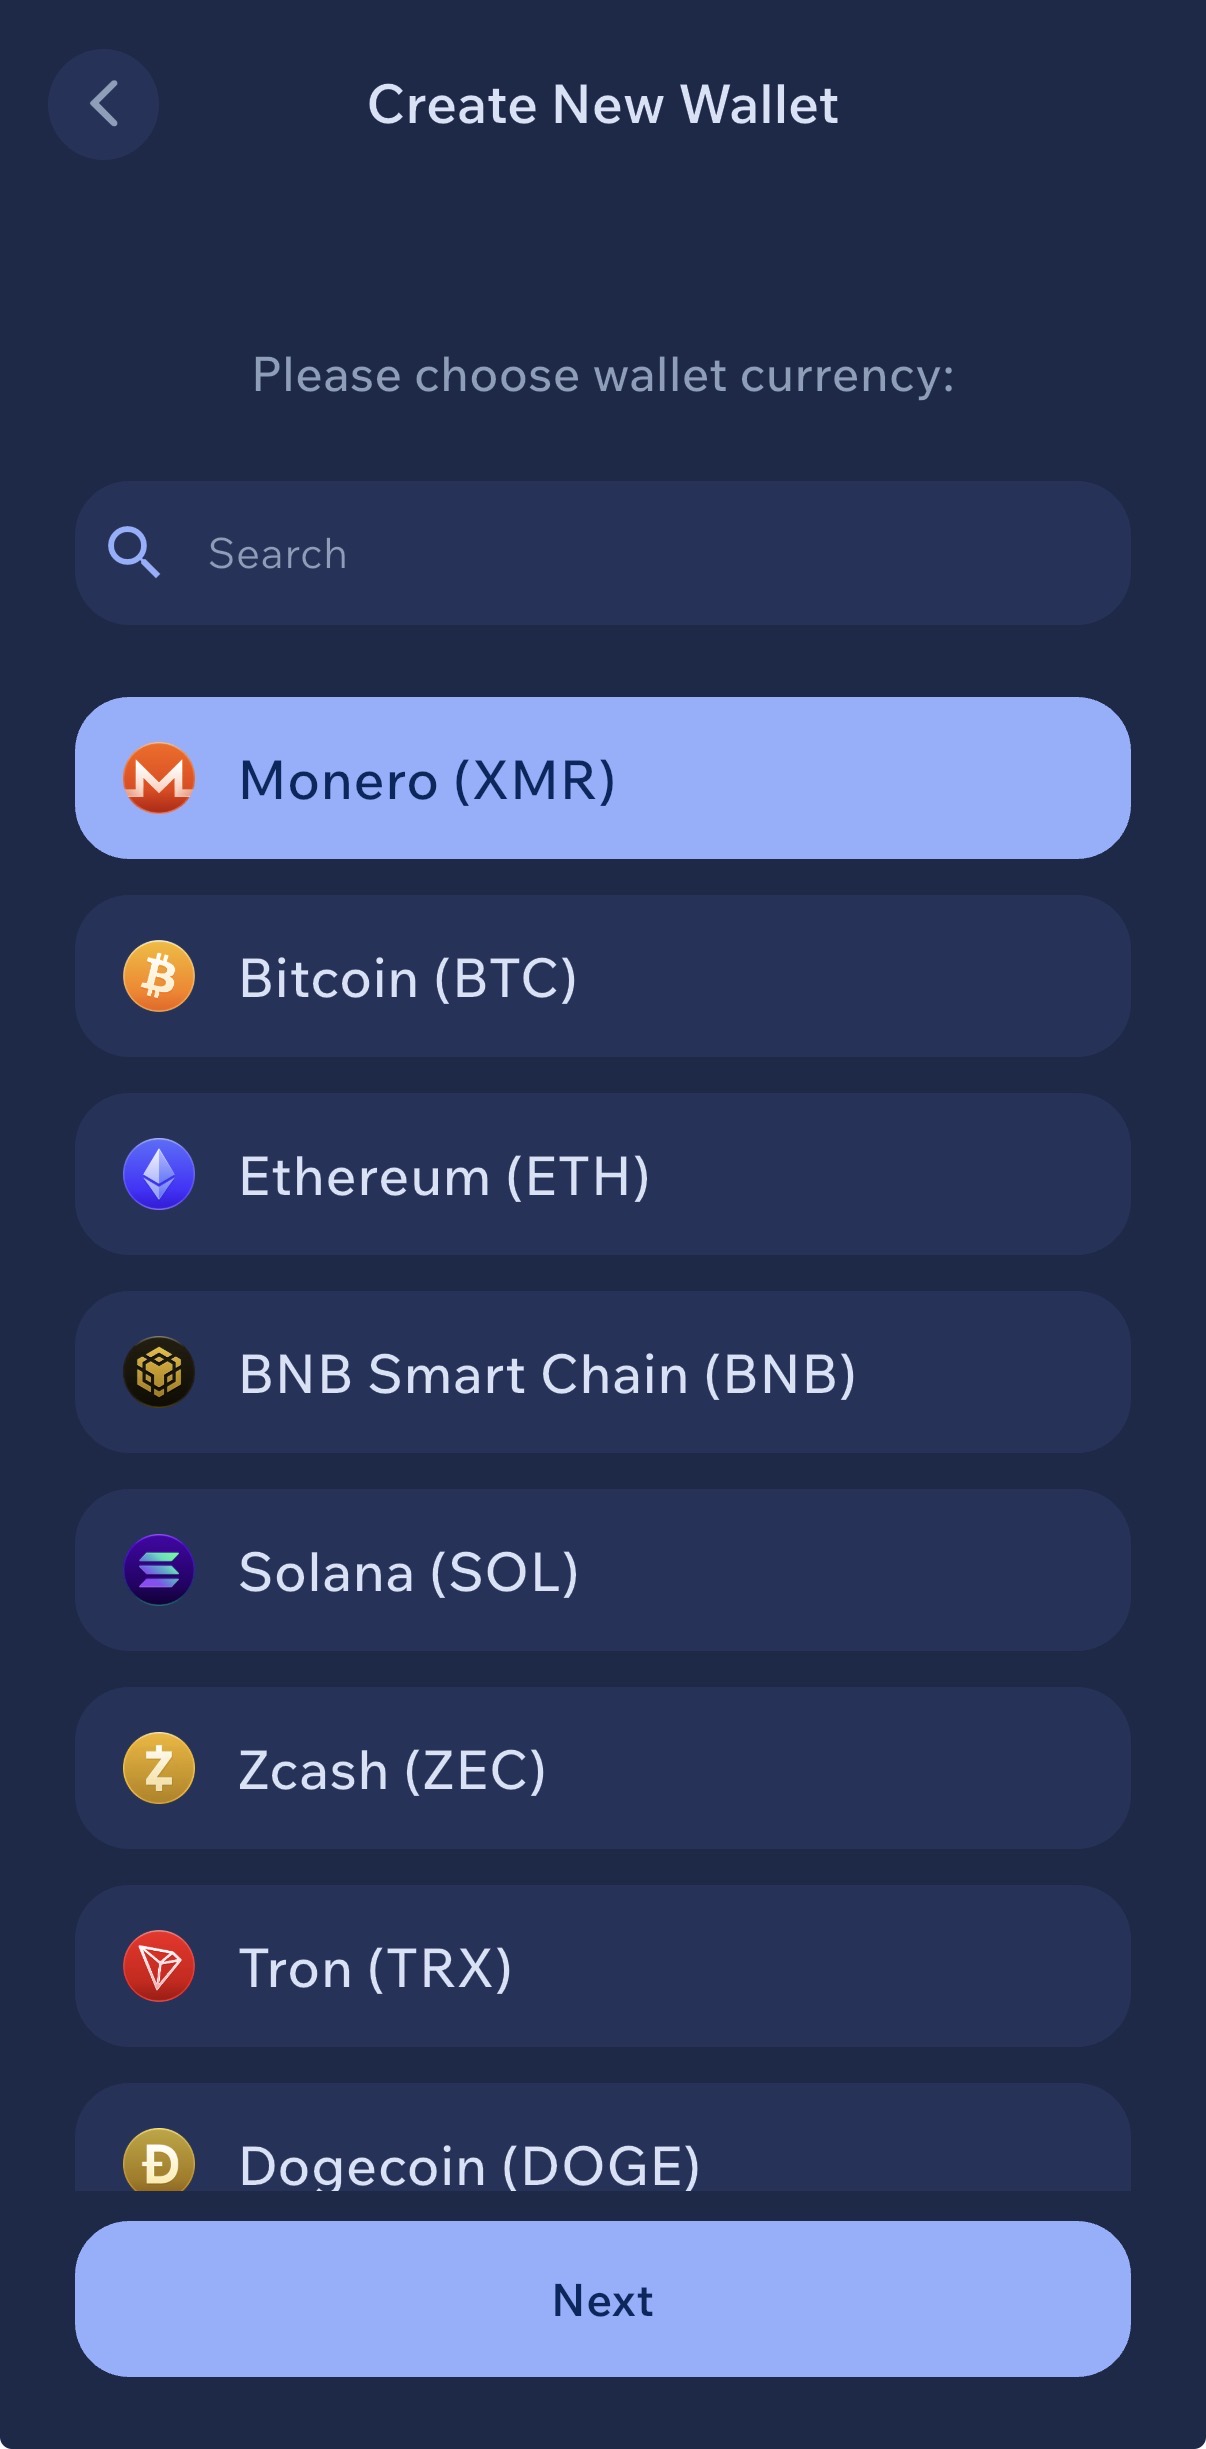
Cake’s documentation identifies Polyseed as the default when creating a Monero wallet. Before changing the seed type or enabling an additional seed passphrase, understand how the choice affects recovery. Receiving your first payment does not require experimenting with advanced recovery settings. See Cake Wallet’s new-wallet instructions.
If you enable a seed passphrase, you must retain that exact passphrase as well as the recovery words. The words alone are insufficient. Losing the passphrase or entering it incorrectly can lead to a different wallet instead of the one you intended to restore. This passphrase is separate from the wallet’s display name and the application PIN; do not treat those items as substitutes.
Step C: finish the backup before receiving funds
Read the application’s explanation before revealing the recovery phrase, then record the words in the correct order. Complete the backup check requested by the application. Do not fund a wallet whose backup you skipped and cannot explain how to recover. An empty wallet is the right place to learn the process without an existing balance at stake.
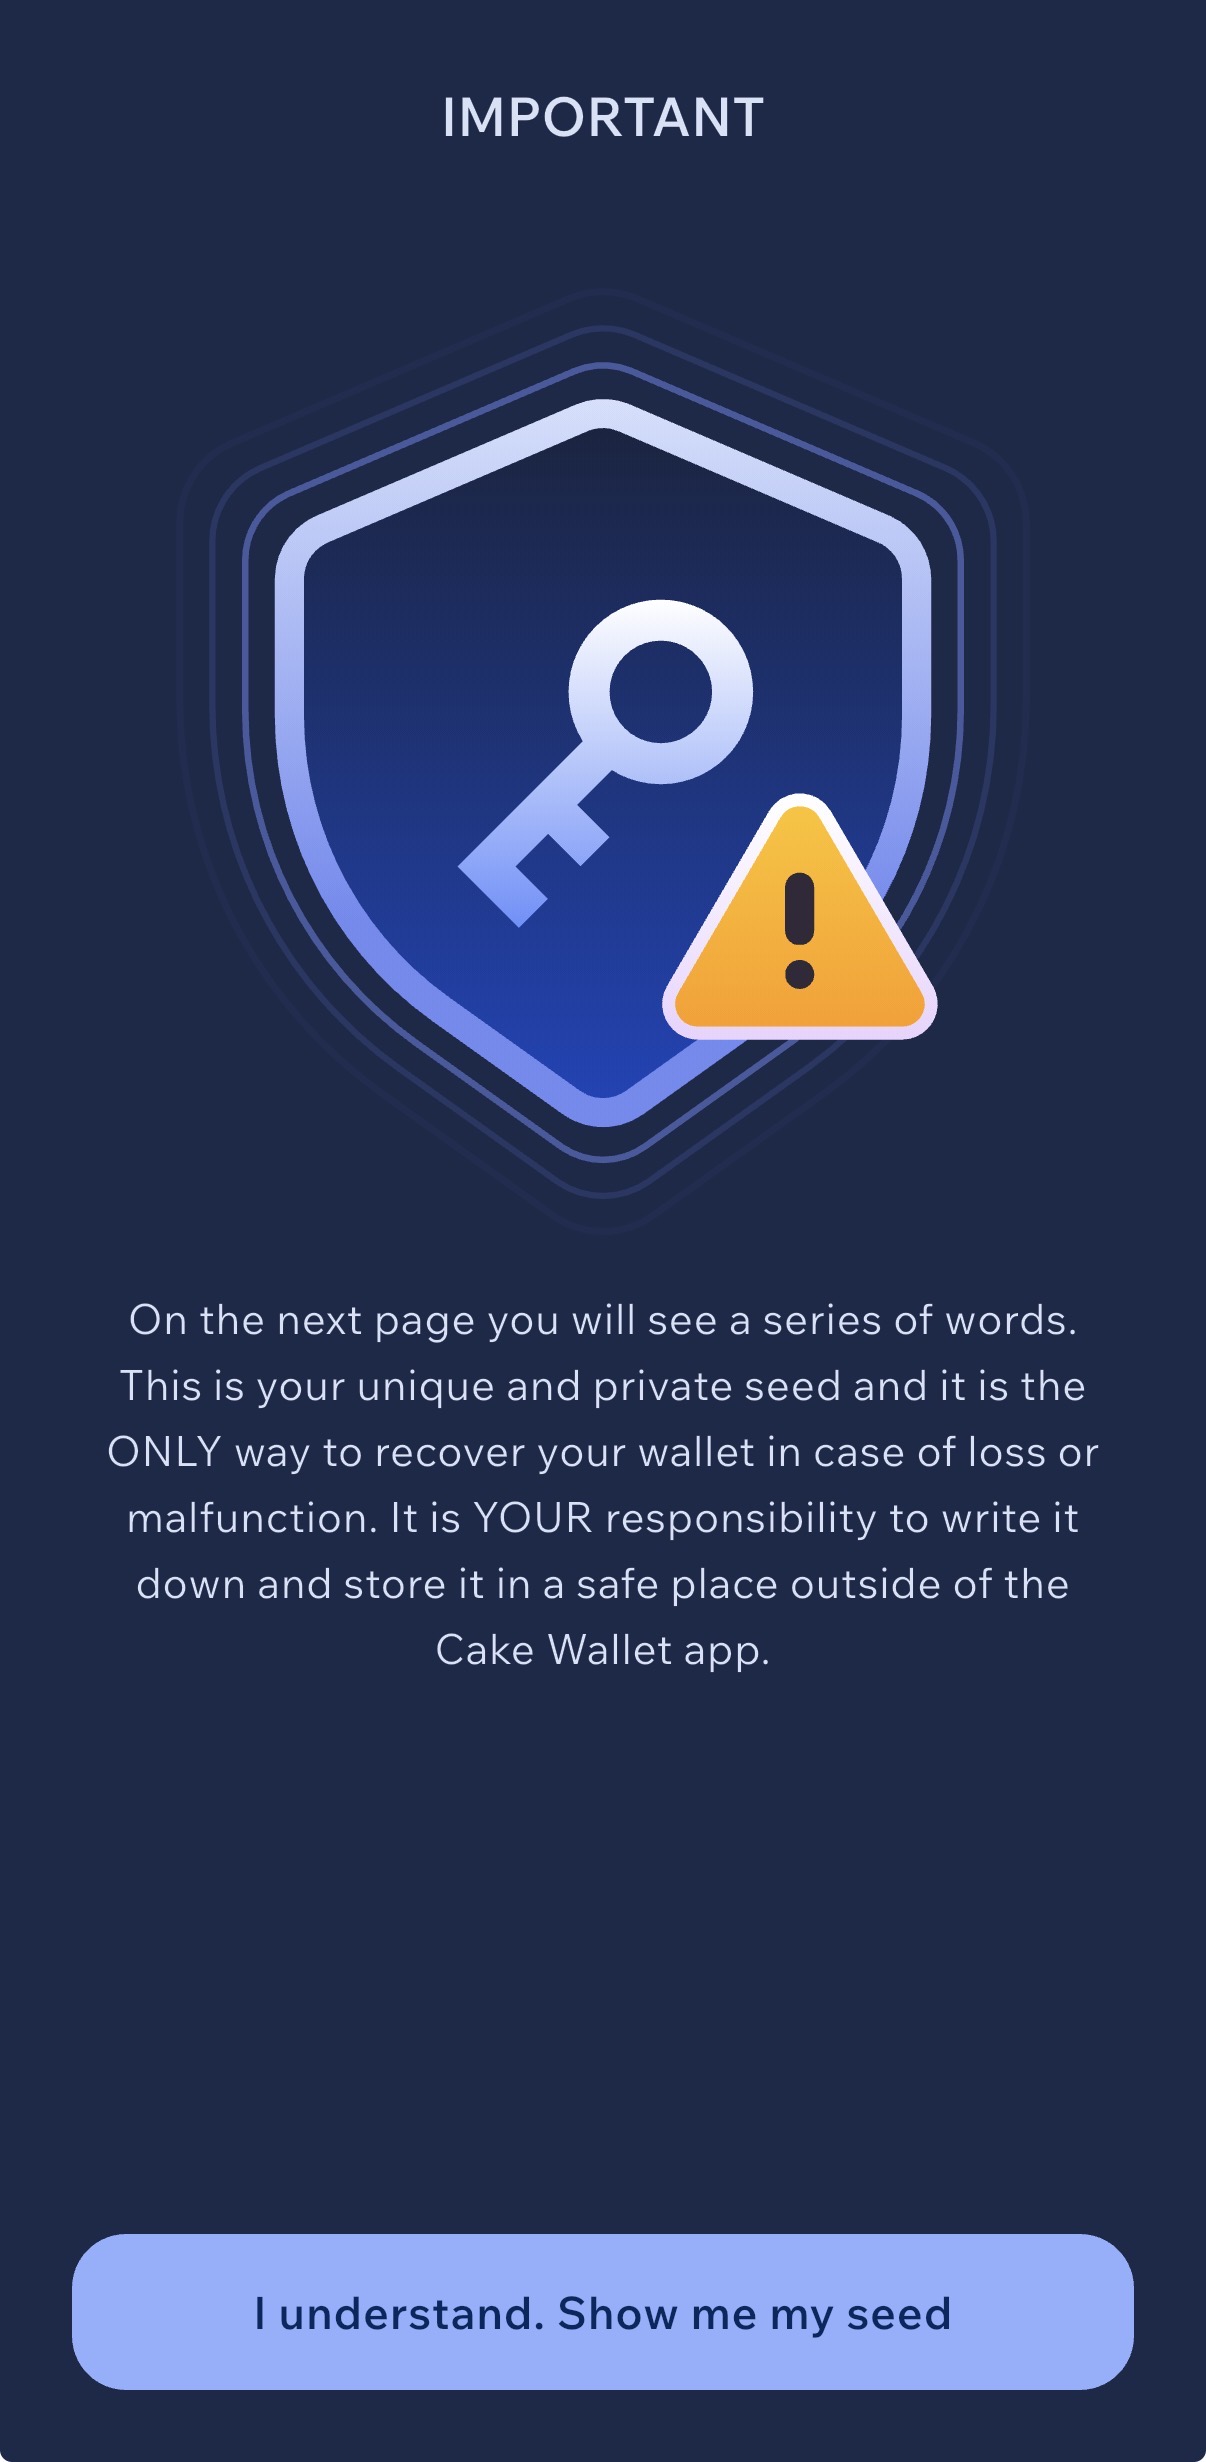
Ask yourself a simple question: if this phone stopped working today, would I know where the backup is and which wallet I need to restore? If the answer is no, finish that preparation before creating a swap. A few minutes spent organizing recovery information now is easier than searching for it after a device is lost.
Step D: open Receive
Open Receive inside the intended Monero wallet and copy its receiving address. Monero supports subaddresses, which its documentation recommends for receiving payments. They let you separate receiving details without creating an independent wallet backup for each payment. They do not erase information you supplied to a service through other means. See Cake’s receiving instructions and Monero’s subaddress explanation.
After pasting, compare the address with the wallet’s receiving screen. Do not check only the icon or a saved contact name. If you use two devices, keep the original receiving screen available and make sure you are reading the intended wallet account. You do not need to publish that address in a comment to get general setup help.
Rehearse the steps without sending anything
You can practice preparation without making a payment. Open Receive, check the asset and copy your address into an empty form, then stop before creating the order. This helps you understand where each piece of information comes from. It does not test delivery or prove that a recovery backup works.
If you paste the wrong address, clear the field and copy again from the correct wallet. Do not try to repair a long address by guessing a missing character or typing it from a screenshot. After scanning a QR code, check what the application actually read. An illustration in a guide is never a substitute for your own receiving details.
For Bitcoin, the asset name is only part of the check. Cake Wallet’s receiving screen can offer Standard on-chain receiving, Lightning and Silent Payments. A swap provider may support some methods and not others. For an ordinary on-chain payout, use an on-chain address that the provider supports; do not automatically substitute a Lightning invoice or Silent Payments address. Check compatibility before funding the order. Cake’s receiving documentation explains these options.
Our English wallet and swap walkthrough shows how wallet preparation relates to the exchange form. When you make your own payment, use your wallet and current order details, rather than any example details visible in the recording.
6. If you receive USDT, plan how you will use it next
Choose the USDT network according to the receiving wallet or service. Familiarity with a network’s name is not enough. If you intend to pay a merchant afterward, check the network in that merchant’s current payment instructions before selecting the output of your swap.
Receiving a token and sending it onward are separate steps. In a standard self-custody transaction, sending USDT on Ethereum requires paying Ethereum gas in ETH. Holding USDT does not by itself establish that you can pay the transaction fee. Check the wallet’s estimate and your available ETH balance. Ethereum’s gas documentation explains how those fees work.
TRON uses Bandwidth and Energy. When the available resources are insufficient, fees may be covered by burning TRX under the network’s rules. There is no single permanently correct amount of TRX to quote here: the transaction and current network parameters matter. Inspect the sending wallet’s estimate before moving your entire budget onto a network. The TRON resource model provides the underlying details.
If your destination is an exchange account, open its current deposit page. Do not rely on an old screenshot someone sent you. Confirm that deposits are enabled, identify the minimum and copy any required extra information. Our XMR-to-USDT receiving guide explains the destination checks in more detail.
7. Move from the prepared wallet to the swap form
You now have a destination, a network and a receiving address. Open the AceChange swap form and select the asset you actually hold. For a token available on several networks, select the network used by your sending wallet. On the receiving side, choose the output for which you prepared the address.
Keep two addresses separate. Your receiving address is where the result of the swap should arrive. The order’s deposit address is where you send the input asset according to that order’s instructions. In a BTC-to-XMR swap, you do not send Bitcoin directly to your Monero address.
Enter an amount, wait for a valid quote and inspect the estimated output. If no quote is available, the route is unavailable or the amount is outside its limits, do not send funds using details from an earlier attempt. You first need a valid order with its own current funding instructions.
Before confirming, check the provider, rate type, receiving address, any required tag and the terms. Creating a wallet without an account does not remove the conditions of the exchange service you choose. Resolve unclear or incompatible requirements before making the deposit.
When the destination requires a memo or destination tag, copy it exactly from the destination’s current deposit page. It does not replace the address: the receiving service may need both. If the order cannot accommodate a required field, confirm that the route supports your destination before continuing. Do not invent a replacement value. Also check whether the order’s input deposit instructions require a memo or tag. FixedFloat’s terms explain the address and memo requirements for funding orders.
After creating the order, retain the information needed to track it. In your sending wallet, enter the order’s current deposit address and requested amount. Compare the final transfer details with the order before signing. For a step-by-step review, use our address, network and memo checklist.
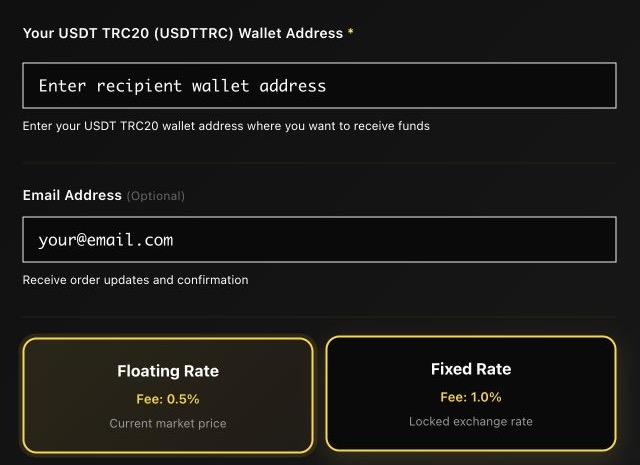
The screenshot shows the receiving address field for USDT on TRON and the rate selection. The input and output currency selectors are elsewhere in the form. Each setting answers a different question: the asset and network describe what should arrive, the address specifies the destination, and the rate type defines the quote’s conditions. Completing one field correctly does not verify the others.
If you want to receive Monero instead, select the appropriate direction and provide your Monero address. Do not copy an illustrated route simply because it matches a video. Your input must match what you own, and the output must match what your prepared wallet supports. Recheck the address whenever you change the receiving network.
8. Check minimums and the complete sending budget
A minimum applies to a particular route and current quote. An old number in an article or video cannot replace the form’s live limit. Also check how much will actually leave the sending service and reach the order. Some services deduct a withdrawal fee from the amount you enter; others add the fee separately. The final sending summary tells you which applies.
For example, imagine an order requesting 100 units of the input token. If your sending service deducts its withdrawal fee from those 100 units, the order may receive less than the required amount. This is an illustration, not an AceChange fee quote. It shows why the sender’s “recipient receives” figure matters as much as the amount typed into a withdrawal form.
Do not judge the complete cost only by a service-fee percentage. Consider what you send, what you expect to receive and what it will cost to use the output afterward. A wallet with just enough to cover the deposit may still lack enough to pay the sending fee. Work out that budget before opening a time-limited order.
| Check | Where to verify it | If it does not match |
|---|---|---|
| Amount meets the route’s limits | Current swap quote | Adjust the amount or wait for a suitable route |
| Amount delivered matches the instructions | Sending summary and order | Correct the transfer before confirming |
| Sending fee is covered | Sending wallet | Prepare the required fee balance first |
| Output meets the destination’s deposit minimum | Receiving service | Use an appropriate amount or another supported destination |
| Rate conditions are understood | Quote and provider terms | Read the conditions before depositing |
A fixed rate has conditions; it is not an indefinitely valid promise. A floating rate can result in a different output from the initial estimate. Use the rules attached to your own order rather than copying a rate or completion time from a recording. See the FixedFloat FAQ and our fixed versus floating rate guide.
9. A small test still needs a valid order
Consider two common routes. You already hold BTC and want XMR in your own wallet: prepare a Monero address, select BTC to XMR and allow for the Bitcoin sending fee. Alternatively, you hold XMR and want USDT on a specific network: now the receiving USDT wallet and network are the key destination checks. Your Monero address does not belong in that order’s recipient field.
Both routes start with the destination, but they differ in more than the exchange rate. The receiving address, transaction checks and fee preparation for the next payment change too. Writing down those details before opening the form reduces the number of decisions you need to make while a quote is active.
A small test can help reveal a mistake in your process, but it must satisfy the route’s current minimum and funding conditions. Sending a few cents to an exchange address is not a universal test. An under-minimum deposit may create a problem that a correctly funded order would not have had.
If you choose to test, create a separate order for a supported amount and follow its instructions. Create any subsequent exchange as a new order. Do not treat the first deposit address as a permanent account address or assume you can send additional installments without fresh instructions. FixedFloat’s current terms specify one transaction per generated deposit address.
10. The swap is complete, but the wallet shows no balance
First distinguish the swap’s status from the wallet’s status. An order might still be waiting for a deposit or confirmations. Alternatively, the provider may have sent the output while the wallet has not yet displayed it. A zero on the wallet’s home screen does not tell you which situation has occurred.
Open the order tracker and verify the asset, network and receiving address. Then check the intended account inside your wallet. An incompletely synchronized Monero wallet may show an incomplete balance. Before attempting restoration, inspect its connection and scanning progress. Cake Wallet’s Monero documentation explains the role of synchronization.
If synchronization stops progressing, check connectivity and then the node configuration. Cake’s instructions lead through Settings, the relevant currency settings and Nodes. Choose a known available node from a trusted source. Do not add an unfamiliar node address sent by someone claiming to be support. Follow the official node-management guide for the controls in your version.
For a restored Monero wallet, also check the backup type and restore starting point. Starting the scan after your first payment can miss earlier transactions. Use the official restoration instructions; do not send recovery words to someone offering to fix the scan for you.
If the problem remains, prepare a concise description: what you sent, what you expected, the status shown and the step where progress stopped. Keep private tracking links and unrelated wallet history out of public forum posts. Our pending swap guide helps distinguish confirmation delays from other issues.
11. Keep useful records separate from wallet secrets
Once the output arrives, check the asset, network and received amount in the correct wallet. Store the order record separately from the recovery phrase. There is no need to combine exchange history, public addresses and the secrets controlling your funds in one document. Someone gaining access to that single document would obtain far more information than necessary.
For your own records, you can note the date, exchange direction, sent and received amounts, and relevant fees. Keep any additional records required by your accounting or legal obligations. There is no universal deletion period in this guide. Maintaining privacy should not leave you unable to understand your own payments.
Before sending a support screenshot, inspect its contents. Remove unrelated balances, personal notes and notifications from other applications. Share what is needed for the particular issue through the service’s verified support channel. Routine order tracking does not require publishing your recovery phrase in a group or comment.
When changing devices, follow the wallet’s recovery documentation. Do not remove the old working installation simply because the new application opens successfully. First confirm that you have the correct recovery information and can check the restored result. A backup is useful only if you can identify which wallet it belongs to and use it correctly.
Questions before your first swap
Do I need a new wallet for every swap?
No. What matters is control over the wallet, support for the asset and the correct receiving address. Monero subaddresses can separate receipts without a separate wallet backup for every payment. Create another wallet for a clear reason, rather than accumulating backups you can no longer reliably identify.
Do I have to connect my wallet to the website?
The deposit-based AceChange workflow described here does not require connecting a wallet. You provide a receiving address and send the input from your own wallet according to the order. Connecting a wallet to a web application and signing its requests are different actions. Understand those requests before approving them. Our swap without connecting a wallet guide explains the difference.
Is a wallet’s built-in swap the same service as AceChange?
Not necessarily. Cake Wallet displays external exchange providers within its interface. If there is a problem, identify where you created the order and which provider processes it. Do not assume that rules from one service apply to another because both support the same asset. See Cake Wallet’s built-in swap documentation.
Can I use a receiving address from a tutorial?
No. An example address explains the process; it is not your destination. Obtain your address from your wallet or your account’s current deposit interface. The same applies to QR codes: successfully scanning one does not prove that it belongs to you. Read the decoded information before confirming a payment.
What should be ready before I open the swap form?
Your backed-up receiving wallet, the correct network, your receiving address and enough to cover the sending fee. Then check the live minimum and quoted output. Prepare anything missing before creating the order, so you can review its instructions calmly instead of troubleshooting your wallet during the funding window.
